You are using an out of date browser. It may not display this or other websites correctly.
You should upgrade or use an alternative browser.
You should upgrade or use an alternative browser.
What have you done to your Tacoma today?
- Thread starter ae111black
- Start date
JayQQ97
MW surVivor ... clutched. 368k on the 0D0
For years I have used Mothers VLR that doesn't leave that slippery ArmorAll finish. I ran out so this time I used the Clazzio all natural leather and vinyl cleaner that comes with Clazzio seat covers. I will continue buying the Mothers. It is the best that I have found. My 3rd gen plates were similar.
View attachment 36931
i will give this a shot then
i had used the chemical guys stuff that is shiny BUT on top of the dash the sun glare reflection to the windshield was obtrusive
mrproduxn
Well-Known Member
Something else that I have done, for many years, is keep a microfiber in the truck to wipe down the dash, door panels, seats and trim. It helps by not having to treat them as often. I used VLR on my 2016 for 5.5 years and the trim and leather seat covers looked like new when I sold it. Every once in a while I would only have ArmorAll on hand. Every time I used it I regretted it. Same goes for treating tires. I hate the shiny look on tires and only want the new flat black clean finish. Unfortunately all I had was ArmorAll tire foam for this car wash. Now 2 days later my damn tires still look wet. Just threw that can in the trash.i will give this a shot then
i had used the chemical guys stuff that is shiny BUT on top of the dash the sun glare reflection to the windshield was obtrusive
Last edited:
JayQQ97
MW surVivor ... clutched. 368k on the 0D0
Something else that I have done, for many years, is keep a microfiber in the truck to wipe down the dash, door panels, seats and trim. It helps by not having to treat them as often. I used VLR on my 2016 for 5.5 years and the trim and leather seat covers looked like new when I sold it. Every once in a while I would only have ArmorAll on hand. Every time I used it I regretted it. Same goes for treating tires. I hate the shiny look on tires and only want the new flat black clean finish. Unfortunately all I had was ArmorAll tire foam for this car wash. Now 2 days later my damn tires still look wet. Just threw that can in the trash.
what do you use for the instrument cluster glass?
i really screwed my relatives '11 single cab up with scratches when i went to dust it off that i had to buy a new OEM piece of glass and need to figure out how to dissamble the cluster paneling to get to that glass or whatever transparent plastic its made of. hopefully i do not have to remove anything off the steering column to access that to swap it out
there are also water spots on the cluster that don't look like they want to come out with invisible glass cleaner
mrproduxn
Well-Known Member
Well I cannot answer that with confidence. I just dust mine with a damp microfiber and compressed air. The 2nd gen is 10x better than the 3rd gen. My 3rd gen scratched easier than any cluster "glass" I ever owned. Ever rubbing with a finger left scratches in that one. Fortunately my 3rd gen cluster was replaced under warranty for odo failure (trip meters constantly self reset) so I never cleaned it again except with compressed air. Many of the 3rd genners were buying screen protectors. Not sure if they make them for earlier gens. Many others just replaced the lens when they got too ugly. I don't believe the steering column is in the way for that job.what do you use for the instrument cluster glass?
i really screwed my relatives '11 single cab up with scratches when i went to dust it off that i had to buy a new OEM piece of glass and need to figure out how to dissamble the cluster paneling to get to that glass or whatever transparent plastic its made of. hopefully i do not have to remove anything off the steering column to access that to swap it out
there are also water spots on the cluster that don't look like they want to come out with invisible glass cleaner
Oh I forgot to mention using play-do or silly putty is an excellent way to get dust and dirt off of your cluster lens. I did use that on the 3rd gen when I sold it. I recently bought some, at the dollartree store, to clean my a/c vents and all the crevices in the dash and shifter. I completely forgot that this cleans the cluster very well.
Last edited:
JayQQ97
MW surVivor ... clutched. 368k on the 0D0
i shall have to take pics of that cluster to show how deep the scratches and spots are
awhile back i stumbled upon a youTube that shows how to polish and buff out the cluster lens, but since a new one was available i just went that route
its called combination meter glass

23$
not bad at all
it looks like it just snaps on and off since i see no screws in that diagram around the lens area
awhile back i stumbled upon a youTube that shows how to polish and buff out the cluster lens, but since a new one was available i just went that route
its called combination meter glass

23$
not bad at all
8385204870 - Toyota Instrument Panel Lens. METER, Electrical | Lewis Toyota, Topeka KS
Genuine Toyota Part # 8385204870 (83852-04870) - Instrument Panel Lens. METER, Electrical. Fits Tacoma. Ships from Lewis Toyota, Topeka KS
parts.lewistoyota.com
it looks like it just snaps on and off since i see no screws in that diagram around the lens area
JayQQ97
MW surVivor ... clutched. 368k on the 0D0
Well I cannot answer that with confidence. I just dust mine with a damp microfiber and compressed air. The 2nd gen is 10x better than the 3rd gen. My 3rd gen scratched easier than any cluster "glass" I ever owned. Ever rubbing with a finger left scratches in that one. Fortunately my 3rd gen cluster was replaced under warranty for odo failure (trip meters constantly self reset) so I never cleaned it again except with compressed air. Many of the 3rd genners were buying screen protectors. Not sure if they make them for earlier gens. Many others just replaced the lens when they got too ugly. I don't believe the steering column is in the way for that job.
Oh I forgot to mention using play-do or silly putty is an excellent way to get dust and dirt off of your cluster lens. I did use that on the 3rd gen when I sold it. I recently bought some, at the dollartree store, to clean my a/c vents and all the crevices in the dash and shifter. I completely forgot that this cleans the cluster very well.
a big issue is water spots
when its rainy or snowy and windy out you open the door and it blows in and you get those spots on the lens
also sneezing LOL it goes everywhere
Last edited:
mrproduxn
Well-Known Member
Well I just looked at my 2008. It does not come out as easy as the 3rd gen. Not a long process but just a lot of steps. When you do this make sure that you put the clips back on before re-assembly. I am sure several will just fall out during the process. You will need to follow these stepsa big issue issue is water spots
when its rainy or snowy and windy out you open the door and it blows in and you get those spots on the lens
also sneezing LOL it goes everywhere
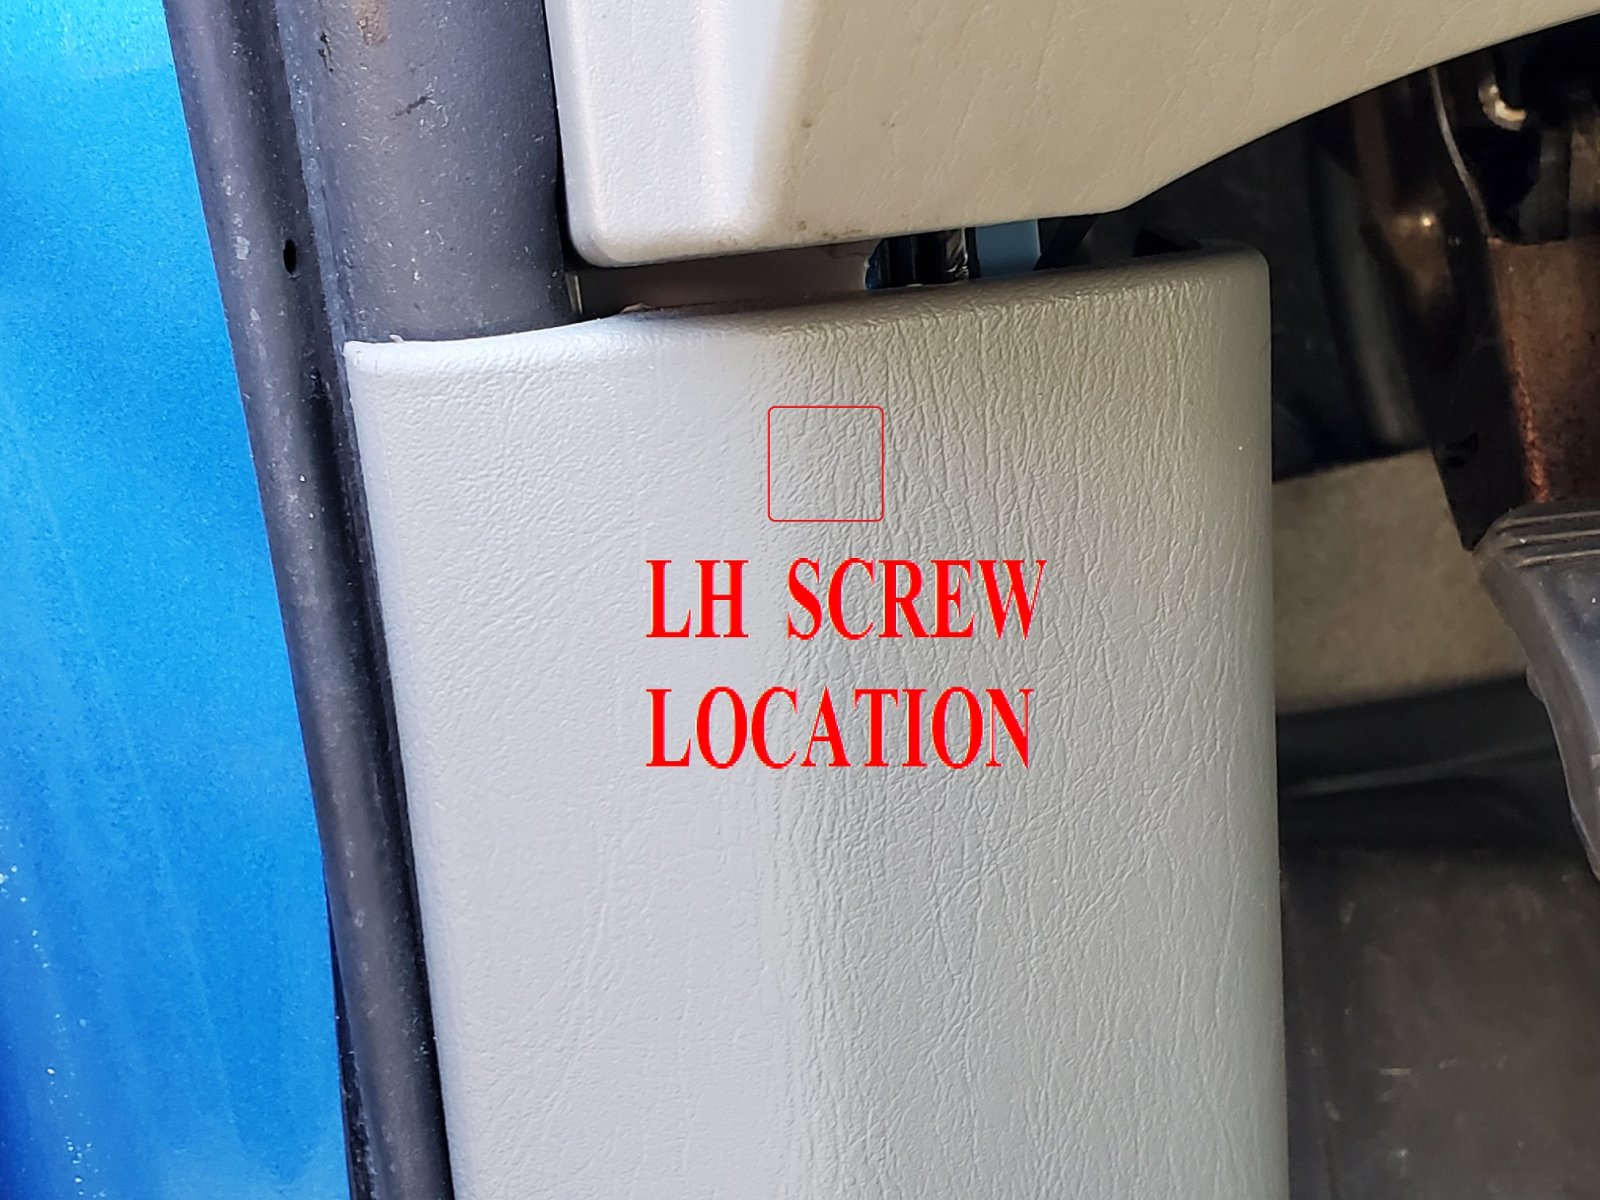
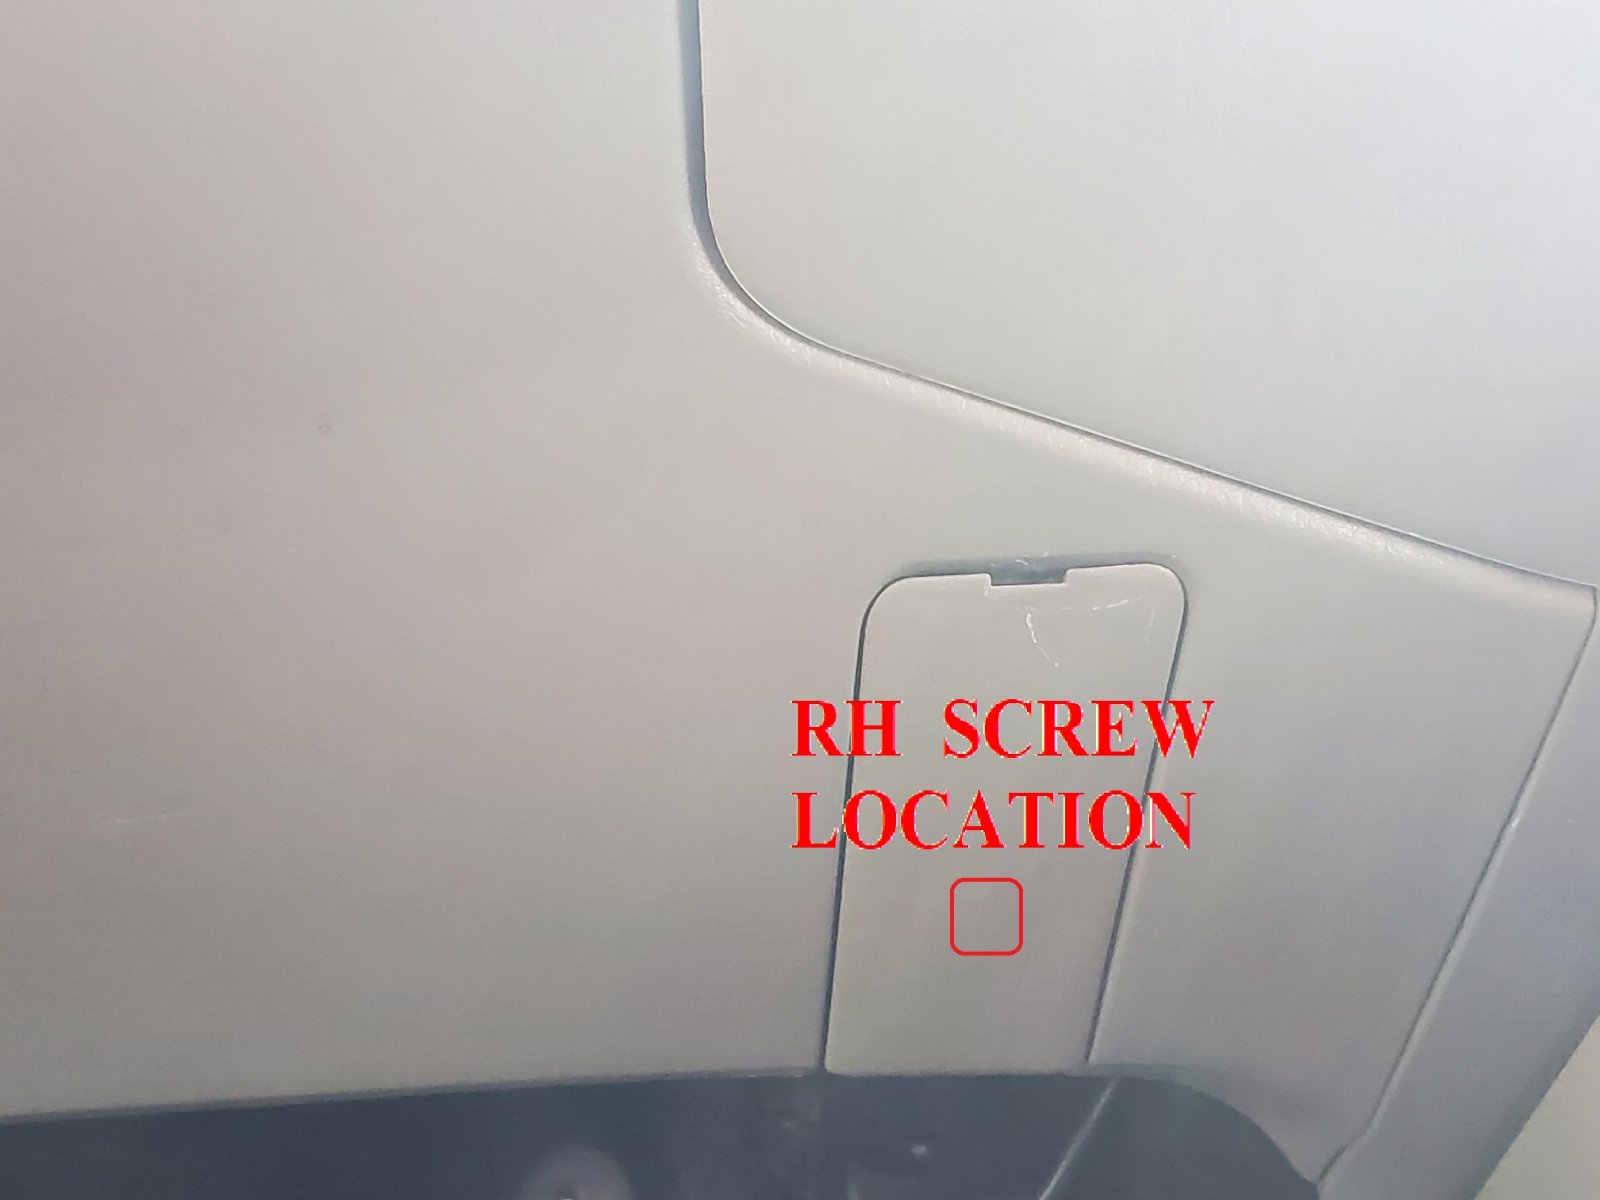
(1) remove foot rest (2) remove lower screw sideways in bottom of kick panel (3) remove floor trim next to driver seat under door with trim tool (4) remove kick panel by pulling from clips *NOW YOU CAN SEE THE LOWER DASH SCREW ON LH SIDE (5) remove lower dash left screw (6) use a pick/small screwdriver to expose screw under little cover under cubby over right knee (7) grab cubby and pull straight out held with clips (8) pull lower dash out from clips but not too far (9) disconnect the power connectors on left side, if available for fog lights, etc, to remove that lower dash panel (10) now gently let that panel lay on the floor (11) remove the vertical plastic screws with expansion clips in top of cluster (12) lower steering wheel tilt all the way down (13) start on left and pull cluster cover trim away from clip (13) do same on right side of cluster cover (14) disconnect any connectors before you wiggle out the cluster cover (15) now you can see the screws holding the cluster in and can remove them (16) pull cluster out far enough to access the connectors behind the cluster (17) replace glass in cluster (18) assemble in reverse
BE CAREFUL NOT TO SCRATCH NEW GLASS WHEN INSTALLING THE CLUSTER COVER !!!!!


Last edited:
JayQQ97
MW surVivor ... clutched. 368k on the 0D0
Thank you so much for the pics and the instructionsWell I just looked at my 2008. It does not come out as easy as the 3rd gen. Not a long process but just a lot of steps. When you do this make sure that you put the clips back on before re-assembly. I am sure several will just fall out during the process. You will need to follow these steps
(1) remove foot rest (2) remove lower screw sideways in bottom of kick panel (3) remove floor trim next to driver seat under door with trim tool (4) remove kick panel by pulling from clips *NOW YOU CAN SEE THE LOWER DASH SCREW ON LH SIDE (5) remove lower dash left screw (6) use a pick/small screwdriver to expose screw under little cover under cubby over right knee (7) grab cubby and pull straight out held with clips (8) pull lower dash out from clips but not too far (9) disconnect the power connectors on left side, if available for fog lights, etc, to remove that lower dash panel (10) now gently let that panel lay on the floor (11) remove the vertical plastic screws with expansion clips in top of cluster (12) lower steering wheel tilt all the way down (13) start on left and pull cluster cover trim away from clip (13) do same on right side of cluster cover (14) disconnect any connectors before you wiggle out the cluster cover (15) now you can see the screws holding the cluster in and can remove them (16) pull cluster out far enough to access the connectors behind the cluster (17) replace glass in cluster (18) assemble in reverse
BE CAREFUL NOT TO SCRATCH NEW GLASS WHEN INSTALLING THE CLUSTER COVER !!!!!
View attachment 36933View attachment 36934
It appears to be much more involving than I had initially thought it be!
JayQQ97
MW surVivor ... clutched. 368k on the 0D0
For years I have used Mothers VLR that doesn't leave that slippery ArmorAll finish. I ran out so this time I used the Clazzio all natural leather and vinyl cleaner that comes with Clazzio seat covers. I will continue buying the Mothers. It is the best that I have found. My 3rd gen plates were similar.
View attachment 36931
I was reading the directions on the VLT product
It says to carefully avoid getting it onto plastics
Why does it say that? What does it do to plastics?
These gen2 are full of plastics!!
mrproduxn
Well-Known Member
I would think, worst case scenario, I could do it in 90 minutes at the max. Luckily it is mostly those standard Toyota little clips. Same thing they use for the radio and hvac controls. There aren't many connectors to deal with so just take your time and go step by step. There is nothing that would worry me about it. I say 90 minutes meaning max of 60 minutes to carefully disassemble and take your time. You can easily put all back together in max 30 minutes. There is nothing to discourage doing it. To me the only real hurdles will be disconnecting the electric connectors. Everything is pinch to unlock and a click when reconnected. Sometimes those connectors are hard to pinch to disconnect. I failed to mention that the foot rest also pops out held by grips on the m10 bolt heads and the side screw in the kick panel is removable by hand. Tightly grips the post. Pull extra hard and it will pop off.Thank you so much for the pics and the instructions
It appears to be much more involving than I had initially thought it be!
mrproduxn
Well-Known Member
I have been rubbing down seat covers, door panels, dashes, seat plastics, consoles and dash trim with it for 7 years, on, at least, 6 family vehicles, with no issues. I spray it on a rag and start wiping. Not for radio screen, dash cluster or exterior trim.I was reading the directions on the VLT product
It says to carefully avoid getting it onto plastics
Why does it say that? What does it do to plastics?
These gen2 are full of plastics!!
They claim your not suppose to use armor-all on tonneau covers, but I'll bet there are guys that have. I've used this tonneau cover protectant the dealer recommended that looks, and smells just like armor-all, that its got me wondering if its really just armor-all, or another way for these companies to make more money selling the same product with a different name.
Last edited:
Rock62
Well-Known Member
I'm curious. Why do you need aggressive or special cleaners to wipe off dust? I think dried coffee or soda or mucus is easily softened and wiped away with a mild detergent and water. As a thought, perhaps some drivers should keep a box of tissues handy.
My go to cleaner is diluted Simple Green on a damp cloth. Its water based, cheap, effective, smells nice...... In undiluted form, Simple Green will clean brake dust off wheels/tires and cut thru grease/dirt schmutz. I've even used it to clean my hands in a pinch.
The plastics in these vehicles have all been made with UV inhibitors molded into the part. No need for "protectants" in cleaners.
FWIW, the lens on the instrument cluster is most likely an optical grade of polycarbonate, commonly known as Lexan.
Idk about Toyotas plastic's, and their trims, but their tonneau covers are not protected from uv rays, the reason they need a protectant. As far as interior cleaners, I've got contract with simonize that protects my trucks interior for as long as I own the truck.I'm curious. Why do you need aggressive or special cleaners to wipe off dust? I think dried coffee or soda or mucus is easily softened and wiped away with a mild detergent and water. As a thought, perhaps some drivers should keep a box of tissues handy.
My go to cleaner is diluted Simple Green on a damp cloth. Its water based, cheap, effective, smells nice...... In undiluted form, Simple Green will clean brake dust off wheels/tires and cut thru grease/dirt schmutz. I've even used it to clean my hands in a pinch.
The plastics in these vehicles have all been made with UV inhibitors molded into the part. No need for "protectants" in cleaners.
FWIW, the lens on the instrument cluster is most likely an optical grade of polycarbonate, commonly known as Lexan.
JayQQ97
MW surVivor ... clutched. 368k on the 0D0
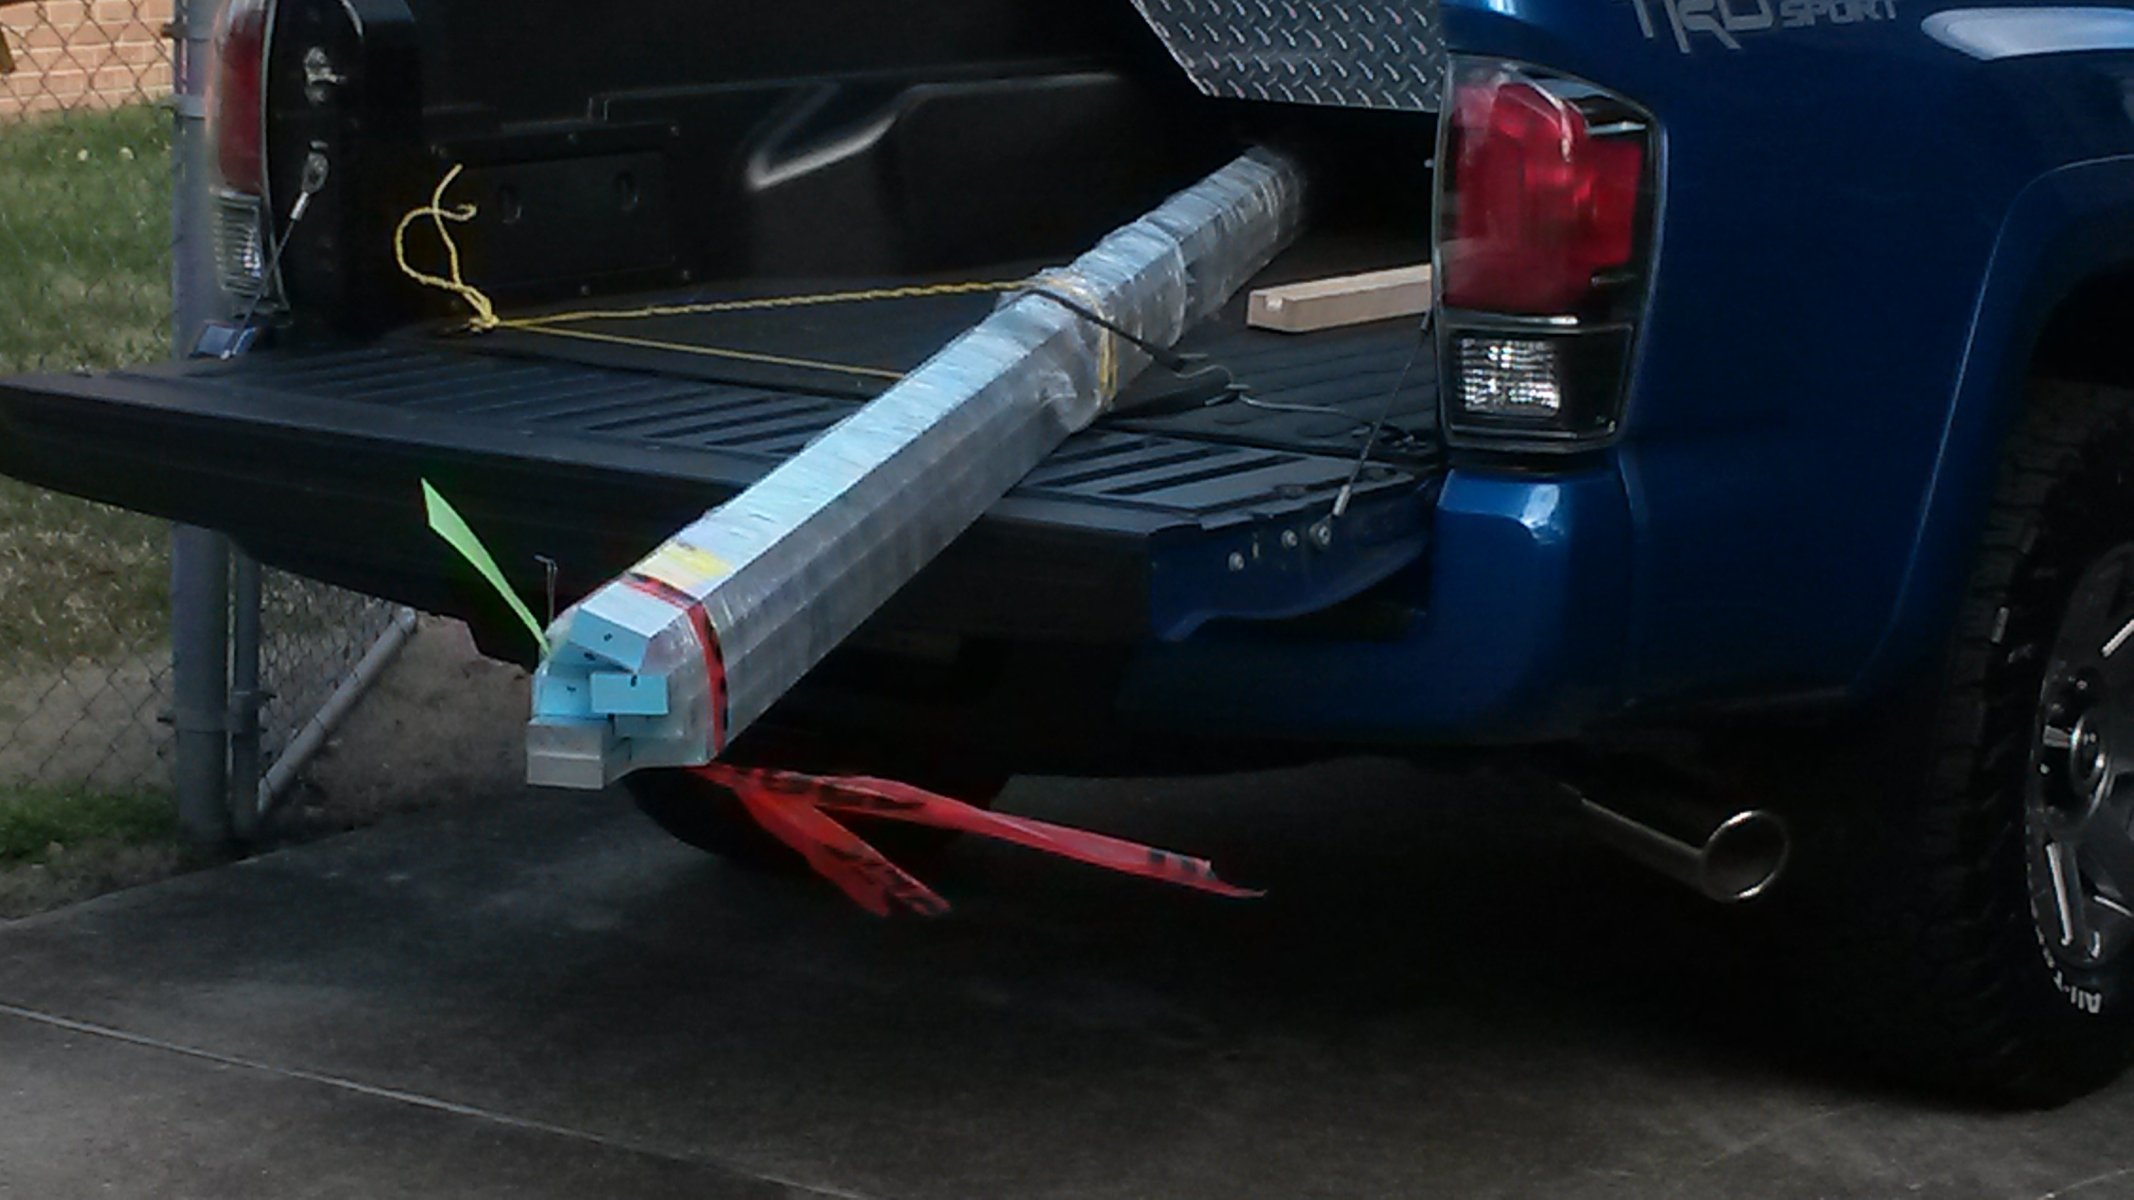
Prison?
I hauled lots of my soon to be ex-brother in laws sh1t to the dump LOL
24-7
Well-Known Member
Prison?
D-I-V-O-R-C-E
He was out of town for work so she wanted to start clearing out the house LOL.

